

Introducing No-Bake Cake Pops: A Sweet Delight Without the Oven!
Indulge your sweet tooth with these delightful no-bake cake pops—an easy and scrumptious treat that requires minimal effort and zero oven time. Perfect for any occasion, from birthday parties to casual gatherings, these pops bring a burst of flavor and a pop of color to your dessert table. Let’s dive into the simple steps that make these treats a quick and enjoyable experience.
Ingredients:
- 12 sugar cookies
- 1 block cream cheese
- White chocolate (or pink, or any color of your choice)
- Sprinkles
Instructions:
- Mix Cookies and Cream Cheese:
- In a bowl, mix together the crumbled sugar cookies and the block of cream cheese until well blended.
- Shape into Balls:
- Shape the mixture into small balls. You can use your hands to form them or use a small ice cream scoop for consistent sizing.
- Insert Sticks:
- Insert a straw or cake pop stick into the center of each ball. This will be the handle for your cake pops.
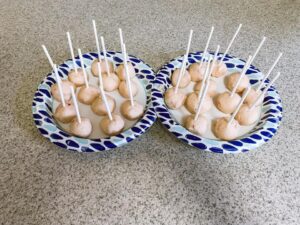
- Chill in Refrigerator:
- Place the formed cake pops in the refrigerator to chill for about 10 to 15 minutes. This helps them firm up.
- Melt Chocolate:
- While the cake pops are chilling, melt the white chocolate in a microwave-safe bowl or using a double boiler.
- Dip in Chocolate:
- Once the cake pops are chilled, dip each one into the melted chocolate, ensuring they are fully coated.
- Decorate with Sprinkles:
- Immediately after dipping, roll the chocolate-covered cake pops in sprinkles for added decoration.
-
Chill Again:
- Place the decorated cake pops back in the refrigerator for about 10 minutes to allow the chocolate to set.

Tips for Perfect No-Bake Cake Pops:
- Consistent Sizing:
- Use a small ice cream scoop or your hands to ensure uniformity in the size of the cake pop balls. This not only looks more appealing but also ensures even chilling and coating.
- Chill Thoroughly:
- Allow the shaped cake pops to chill in the refrigerator for the recommended time. This helps them firm up, making the dipping and coating process much smoother.
- Avoid Over-Mixing:
- When combining the crumbled cookies and cream cheese, mix until just blended. Over-mixing can result in a texture that’s too sticky or dense.
- Sturdy Sticks:
- Ensure your cake pop sticks or straws are sturdy enough to support the weight of the cake pop. Insert them carefully and ensure they are centered to prevent any mishaps.
- Drip Off Excess Chocolate:
- After dipping the cake pops in chocolate, tap off any excess to avoid a thick and uneven coating. This helps in achieving a more refined and visually appealing final product.
- Coordinate Colors:
- Coordinate the color of the chocolate coating with the theme or occasion. You can use different colored chocolates or add food coloring to achieve the desired effect.
- Experiment with Sprinkles:
- Explore various types of sprinkles, colored sugars, or edible glitter to add a touch of whimsy. Mix and match to create eye-catching and personalized designs.
- Add Crunch:
- Enhance the texture by incorporating finely chopped nuts, cookie crumbs, or even rice cereal into the cookie and cream cheese mixture for an added crunch.
- Dip in Multiple Colors:
- For a more dynamic look, dip the cake pops in multiple colors of chocolate, creating a marbled or ombre effect.
Variations to Spice It Up:
- Flavor Infusion:
- Experiment with different flavored cookies for a unique twist. Chocolate chip, snickerdoodle, or even gingerbread cookies can bring exciting new flavors.
- Fruity Bliss:
- Add a burst of fruitiness by mixing in finely chopped dried fruits like strawberries, cherries, or apricots into the cookie and cream cheese base.
- Candy Surprise:
- Insert a small piece of your favorite candy, like a caramel or chocolate truffle, into the center of each cake pop for a delightful surprise.
- Cookie Monster Pops:
- Use your favorite sandwich cookies instead of sugar cookies for a different flavor profile. Oreo cake pops, anyone?
- Gourmet Coatings:
- Experiment with different types of coatings like dark chocolate, milk chocolate, or even flavored coatings like mint or raspberry.
- Nutty Affair:
- Roll the chocolate-coated cake pops in finely chopped nuts like almonds, pistachios, or hazelnuts for an added layer of flavor and texture.
-
Seasonal Themes:
- Tailor your decorations to match the season or holiday. Use pastel colors for spring, red and green for Christmas, or spooky decorations for Halloween.
Why You’ll Love No-Bake Cake Pops:
- Quick & Effortless Delight:
- No need to preheat the oven or spend hours in the kitchen. These no-bake cake pops come together swiftly, making them the perfect last-minute treat for any sweet craving.
- Foolproof Fun for All Ages:
- This recipe is beginner-friendly, making it a fantastic activity for kids and adults alike. Get the whole family involved in the creative process of shaping, dipping, and decorating these delightful pops.
- Endless Customization:
- Tailor your no-bake cake pops to match any theme or occasion. From choosing different cookie flavors to experimenting with vibrant chocolate colors and assorted sprinkles, the possibilities are as endless as your imagination.
- Portable & Shareable:
- The convenient stick handles make these cake pops an ideal portable dessert. Perfect for parties, picnics, or simply sharing with friends, these treats are as easy to serve as they are to enjoy.
- Satisfying Sweet Cravings:
- Indulge in a bite-sized burst of sweetness without the guilt. The combination of creamy cookie and cheese mixture with a decadent chocolate coating provides a satisfying treat that won’t leave you feeling overwhelmed.
- Versatile Occasion Treat:
- Whether it’s a birthday celebration, a holiday gathering, or just a sweet treat for yourself, these no-bake cake pops effortlessly elevate any occasion. Their visually appealing and delicious nature ensures they steal the show wherever they go.
- Mess-Free Magic:
- No need to worry about a kitchen covered in flour or dirty dishes. With minimal prep and simple assembly, these cake pops offer the joy of baking without the mess.
-
Cooling Refreshment:
- Enjoy a cool and refreshing dessert, especially during warmer months. The brief chilling times in the refrigerator ensure that these treats are as refreshing as they are delightful.

How to store it :
Proper storage ensures that your no-bake cake pops stay fresh, maintain their texture, and remain delicious. Here’s how to store them:
- Refrigeration:
- Store the finished cake pops in an airtight container in the refrigerator. The cool temperature helps maintain their shape and prevents the chocolate coating from melting.
- Layering:
- If you need to stack the cake pops in the container, consider placing parchment paper or wax paper between layers to prevent them from sticking together.
- Avoid Moisture:
- Moisture can affect the texture of the cake pops. Ensure they are fully cooled before placing them in the storage container, and avoid storing them in a humid environment.
- Avoid Odor Absorption:
- Store cake pops away from strong-smelling foods in the refrigerator to prevent them from absorbing unwanted odors.
- Serve at Room Temperature:
- While they are stored in the refrigerator, it’s generally best to allow the cake pops to come to room temperature for a few minutes before serving. This helps to enhance their flavors and makes for a more enjoyable eating experience.
- Freezing (Optional):
- If you want to store them for a more extended period, you can freeze the cake pops. Place them on a baking sheet lined with parchment paper in the freezer until they are firm. Once frozen, transfer them to a sealed freezer bag or airtight container. When ready to enjoy, thaw them in the refrigerator.
- Avoid Direct Sunlight:
- Keep the container away from direct sunlight, as sunlight can cause the chocolate coating to melt or discolor.
-
Consume Within a Week:
- While these cake pops can last in the refrigerator for a week or more, they are best enjoyed fresh. The texture and taste are optimal within the first few days.


